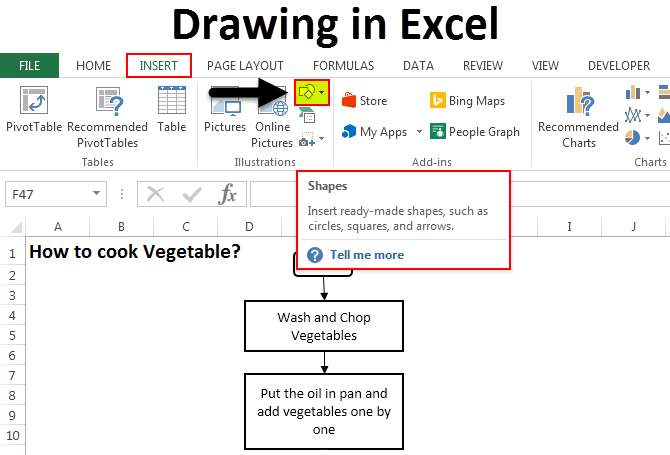
If you get bored with using the same old charts and graphs, then, it is time to learn how to draw in excel. Because with this, you can spice up your presentations with some eye-catching visuals. With a few clicks, you can create great illustrations, diagrams and even logos. So, we will explore the various Drawing tools available in Excel right below.
Table of Contents
Introduction to how to draw in excel?
Sometimes we can say default charts and graphs just don’t cut it. That’s where the Drawing tools come in. Because in this way, you can create custom shapes, lines and text boxes like you are drawing on a paper.
Getting Started with draw line in excel
how do you draw a line in excel?
- First, you have the Drawing tools visible on your Excel ribbon. If you cannot see it, you should go to the Insert tab and click on the Shapes. Now on, you will select New Drawing Canvas for your Drawing objects.
- Now, you should select the shape from the Shapes menu. You can choose from basic shapes like rectangles, circles and triangles. Or even more complex shapes like arrows and flowchart symbols.
- Then, you click and drag on the canvas to draw it. You can resize and reposition it by clicking and dragging on the edges or corners.
- If you wanna customize your shape, you should right-click on it and select Format Shape. Now, you can change the fill color, line style and other properties.
How to Use Drawing Tool in Excel? Tips and Tricks
1. Use the Gridlines for Precision
If you wanna turn on the gridlines, you will go to the View tab and check Gridlines box. It will bring a grid of evenly spaced dots. So you can use them as a guide for placing and sizing your shapes.
2. Group and Ungroup Objects for Excel Drawing Tools
If you have multiple Drawing objects you can group them. So here, you will select all the objects and hold down the Shift key while clicking on each object. Then basically will right-click and select Group.
To ungroup objects, you select the group and then right-click and select Ungroup.
3. Freeform Shape Tool for Custom Shapes excel drawing
The Freeform Shape will create custom shapes by drawing them freehand with your mouse. But here, you select it from the Shapes dropdown menu. Then you will click and drag on the canvas to draw your shape. You can add and remove points by clicking and selecting Edit Points.
4. Use the Text Box Tool for Annotations
So, Text Box can add annotations and labels to your Drawing objects. For applying it, you select it from the Shapes dropdown menu. You can now click and drag on the canvas and write your message or title.
5. Merge Shapes Tool for Custom Shapes
This one can combine multiple shapes into a single custom shape. Here, you will select the shapes you want to merge, then go to the Format tab and click on Merge Shapes. So now, you will have variety of options like Union, Combine and Subtract to create your custom shape.
6. Using Eyedropper Tool for Color Matching
This tool will match the color of your Drawing objects to other elements. First you will select the object whose color you want to match and then you select the Eyedropper tool from the Shapes menu. Now, you will click on the element whose color you want to match. Voila, Excel will automatically update the color.
7. Applying Selection Pane for Organization
Here, Selection Pane can organize and manage your Drawing objects. To open it, you will go to the Format tab and click on Selection Pane. Now on, you can rename objects, reorder them and even hide or lock them.
8. Format Painter for Consistency
The Format Painter can copy the formatting of one object and apply it to another. For that, you will select the object with the formatting you want to copy. And then, you can click on the Format Painter tool from the Home tab. Basically, you will just click on the object you want formatting and Excel will automatically update it.
9. Creating SmartArt for Diagrams
Excel’s SmartArt tool can create complex diagrams and flowcharts. If you wanna give a try, you will go to the Insert tab and click on SmartArt. Now, you can select from different diagram types and customize them.
10. Using Pictures for Visual Impact
Good news here is, you can also add pictures to your Excel file for added visual impact. If you wanna add a picture, you will go to the Insert tab and click on Pictures. Here, you can select the image you want to insert or load it from your PC. And you can then customize its properties.
Drawing in Excel FAQs: Is there a drawing tool in Excel?
inserting my own custom shapes:
If you have a shape or image ready, you will save it as a PNG or JPEG file. In Excel, you will go to the Insert tab and click on Pictures. Now, you will select your custom shape and insert it with one click.
Can I use Drawing in Excel on a Mac?
Yes, you can of course. The Drawing tools are available on both Windows and Mac versions of Excel.
Is it Possible to Use Drawing in Excel to create logos?
Yes, Drawing tools are perfect for creating simple logos and graphics.

A dedicated Career Coach, Agile Trainer and certified Senior Portfolio and Project Management Professional and writer holding a bachelor’s degree in Structural Engineering and over 20 years of professional experience in Professional Development / Career Coaching, Portfolio/Program/Project Management, Construction Management, and Business Development. She is the Content Manager of ProjectCubicle.


